Notes:
This software will enhance iPod compatibility.
For map updates, the software version on the AVN must have MN010071.vbk or higher prior to installing the new map updates.
This update will delete all phonebook information, phone pairing, radio stations, and audio settings. The unit will default to factory settings. |

Preparations
Have a blank CD-R ready. Download the update file and burn it to the CD-R.
This CD-R will now function as the update disk. |
 |
| MN010075.vbk |
|
*Please make sure that the data file name (MN010075.vbk) is not renamed or altered in any form. Please ensure data file is burnt to root directory. Please burn upgrade disc by "ISO9660" format or "Joliet".
Any change to the file name will invalidate the update disk and not allow the update to be performed.
*During the entire software updating process, make sure that the ACC is never switched off or unplugged.
| Version update process |
 |
- Insert the update disk into the AVN726E/AVN76D unit.
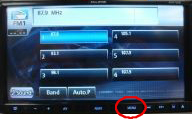
- Push the "MENU" control (hardware switch). The Audio screen will display.
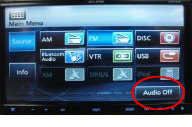
- Push the "AUDIO OFF" button to place unit into the "AUDIO OFF" mode.
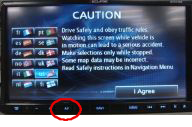
- Push the "AV" control (hardware switch).
- On the screen that displays, the four corners of the screen (A, B, C, and D) should be pushed sequentially A⇒B⇒A⇒C⇒A⇒D.
Note: A,B,C,D are not displayed on the screen. These are indicated as areas to press to activate the software update screen.
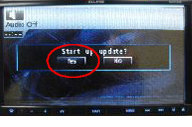
- When you see "Start up update?" displayed, push "Yes."
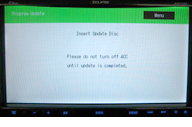
- The unit will now start to read the data and begin the update version. Please allow the process to complete before continuing.
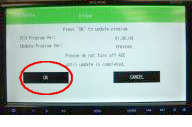
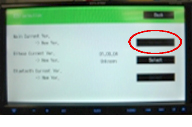
- When all the data is read, the display will show an update selection screen.
- Press "OK" and wait for the update process to complete.
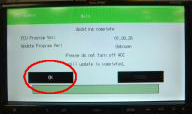
- Once the update process is complete, press "OK" again.
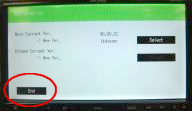
- Press "END".
- Turn the vehicle's ACC off.
- Wait approximately 10 seconds, then turn the vehicle's ACC on.
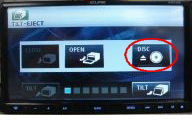
Push EJECT and remove the disk.
The update process is now completed.
 |